The rapid advancement of digital technology has made the present world more creative and competitive. Thus, we require solutions for developing competitive and user-friendly apps. Informatica is one such tool. It is also termed an ETL (Extract, Transform, Load) tool. Many enterprises perceive it as a solution for complete data integration.
Introduction to Workflow
A workflow is a group of instructions or commands which informs the integration sessions about working or running tasks in Informatica workflow. The integration service is an entity which reads workflow information from the repository, fetches data from sources and transforms them. Email notices, session tasks, and command tasks are some of the tasks included here.
There is an entire sequence of steps from creation to execution in the Informatica workflow. Some steps include creating a workflow, adding tasks to the workflow, creating command tasks, linking the command task to the workflow’s beginning task, and executing everything together.
While developing a workflow, we must select an integration service to ensure it runs smoothly. Users can take the help of a workflow monitor to observe and manage the progress of Informatica workflow.
This PowerCenter application is majorly used for building powerful business applications for data extraction from various sources or warehouses. This data is then transformed and loaded into their respective targets as per the business requirements. Let us learn more about the monitoring and management of this business intelligence tool.
In order to evaluate your skills in Informatica, Informatica Training helps a lot.
How to create a Workflow?
A Workflow is like an empty container. It can store an object you want to execute. You can create tasks and then add the tasks you created to the workflow you want to execute.
How to execute a Workflow?
Workflow execution can be done in two ways.
- Sequence: Tasks execute in the order in which they are defined
- Event-based: Tasks get executed based on the event conditions.
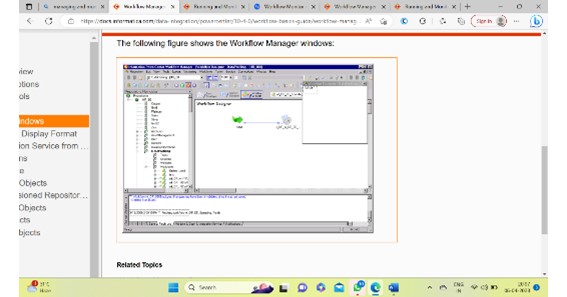
How to open a Workflow Manager?
Following are the steps to open Workflow Manager:
Step 1 – Click on the workflow manager icon on the Informatica designer.
Step 2 – After the workflow manager opens, follow the following steps.
- Connect to the repository and double-click on the folder to connect.
- Enter your user’s name and password
- Then click on the connect button.
Step 3 – Now, to open the workspace of the workflow manager, follow the given steps.
- Right-click on the folder
- Select the open option in the pop-up menu.
How to Create Connections for Workflow Manager?
It would be best to build specific connections to perform tasks within the Informatica workflow manager. You can then link the integration service to various objects with the help of these connections. For example, users with a source table within the Oracle database will also require an Oracle connection. Thus, the integration service is mandatory to link the database for obtaining the source data.
There are different types of connections users can build within the workflow manager. These include Relational connection, FTP connection, Application, and Queue. The selection of a particular type of connection depends on the type of source and target systems users want to link. More often, you would be using relational connections. Let us see how to create a relational connection.
How to create a Relational connection?
Follow the following steps to create a relational connection –
Step 1 – In Workflow Manager, click on the Connection menu and then select Relational option.
Step 2 – In the pop-up window, select Oracle in the type and then click on the new button.
Step 3 – In the new window of connection object definition
- Enter the name of your connection
- Enter Username
- Enter password
- Enter connection string
- Leave other settings as default.
- Click on OK.
Step 4 – You will return to the previous window.
Step 5 – Click on the close button. Now you are ready with the relational connection in the workflow manager.
Components of a Workflow Manager
There are three different component tools of workflow management. These help in creating various objects within the workflow manager. These tools are
- Task Developer
- Worklet Designer
- Workflow Designer
Task developer – It is a tool with the help of which you can create reusable objects. Reusable objects in the workflow manager can be reused in multiple workflows. For example, if you have created a command task in task developer, you can reuse this task in any number of workflows. The role of the Workflow designer is to execute the tasks that are added to it. You can add any number of tasks to a workflow. You can create three major types of reusable tasks in task development.
- Command task
- Session task
- Email task
- Command task – A command task is used to execute different Windows/Unix commands during the execution of the workflow. You can create command tasks to execute various command-based tasks. With the help of this task, you can execute commands to create files or folders, delete files or folders, and do ftp of files etc.
- How to create a command task?
Step 1 – To create a command task, we will use Task Developer. In Workflow Manager, open the task developer by clicking on task developer from the menu.
Step 2 – Once the task developer is opened, select the Tasks menu and Create option.
Step 3 – Now, in the create task window, select the command as the type of task to create, enter the task name, and select the create button. This will create a command task folder.
Step 4 – To configure the task, double-click the command task icon, which will open an edit task window. Now, on the new edit task window.
- Select the commands menu
- Click on the add new command icon
- Enter command name
- Click on the command icon to add command text
- This will open a command editor box.
Step 5 – On the command editor box, enter the command and select OK.
Step 6 – Return to the edit tasks window, and you can see the command you added to the command text box. Click OK on the edit task window. The command task will be created in the task. Use the ctrl+s shortcut to save the changes in the repository.
- How to create a workflow to execute command tasks?
To execute command tasks, you must switch to workflow designer. A workflow designer is a parent or container object in which you can add multiple tasks, and when the workflow is executed, all the added tasks will execute. To create a workflow, follow the following steps.
Step 1 – Click on the workflow designer menu to open the workflow designer.
Step 2 – In workflow designer, select the workflows menu and select Create option.
Step 3 – In the workflow window, enter the workflow name, select the OK button, and leave other options as default.
Step 4 – When you create a workflow, it does not consist of any tasks. So, to execute any task in a workflow, you must add a task to it. To add the command task that we have created in Task Developer to the workflow designer.
- In the navigator tree, expand the tasks folder.
- Drag and drop the command task to the workflow designer.
Step 5 – Select the link task option from the toolbox from the top menu. The link task option links various tasks in a workflow to the start task so that the order of execution of tasks can be defined.
Step 6 – Selecting the link task icon will allow you to drag the link between the start task and the command task. Now select the start task and drag a link to the command task. Now you are ready with the workflow having a command task to be executed.
- How to execute workflow?
To execute the workflow, select the workflows option from the menu and select the start workflow option. This will open the workflow monitor window and execute the workflow. Once the workflow is executed, it will execute the command task to create a folder in the defined directory.
- Session Task A session task in Informatica is required to run a mapping. Without a session task, you cannot execute or run a mapping, and a session task can execute only a single mapping. So, there is a one-to-one relationship between a mapping and a session. A session task is an object with the help of which Informatica gets to know how and where to execute a mapping and at which time. Sessions cannot be executed independently; a session must be added to a workflow. In the session, object cache properties can be configured and advanced performance optimization configuration.
- How to create a session task?
In this exercise, you will create a session task for the mapping “m_emp_emp_target” you created in the previous article.
Step1 – Open Workflow manager and open task developer.
Step 2 – Once the task developer opens, go to the main menu in the workflow manager, click on the task menu, and then select the create option. This will open a new window, Create task.
Step 3 – In the create task window, select the session task as a type of task, enter the name of the task and then click the create button.
Step 4 – A window for selecting the mapping will appear. Select the mapping you want to associate with this session; for this example, select “m_emp_emp_target” mapping and click the OK button. The session object will appear in the task developer.
Step 5 – In this step, you will create a workflow for the session task. Click on the workflow designer icon.
Step 6 – In the workflow designer tool, click on the workflow menu and select create option.
Step 8 – Enter the workflow name in the create workflow window and select OK.
Step 9 – In the workflow manager, a start task will appear, it is a starting point for the execution of the workflow. Expand the sessions folder under the navigation tree, then drag and drop the session you created in the workflow manager workspace.
Step 10 – Click on the link task option in the toolbox.
Step 11 – Link the start task and session task using the link.
Step 12 – Double click on the session object in the workflow manager. It will open a task window to modify the task properties.
Step 13 – In the edit task window
- Select the mapping tab
- Select the connection property
- Assign the connection to the source and target, the connection which we created in the early steps.
- Select the OK button. Now your workflow configuration is complete, and you can execute the workflow.
- How to add multiple tasks to a start task?
The start task is a starting point for the execution of the workflow. There are two ways of linking multiple tasks to a start task.
- Parallel – In parallel linking, the tasks are linked directly to the start task, and all tasks start executing simultaneously.
- How to add tasks in parallel mode?
Step 1 – In the workflow manager, open the workflow “wkf_run_command”
Step 2 – In the workflow, add the session task “s_m_emp_emp_target”. ( by selecting session and then dragging and dropping)
Step 3 – Select the link task option from the toolbox
Step 4 – link the session task to the start task (by clicking on start tasks, holding the click and connecting to the session task)
Step 5 – Start the workflow and monitor in the workflow monitor.
- Serial
- How to add tasks in serial mode?
But before we add tasks in serial mode, we must delete the task that we added to demonstrate parallel execution of the task. For that
Step 1 – Open the workflow “w.kf_run_command”, select the link to the session task, then select the edit option in the menu and delete option.
Step 2 – The confirmation dialogue box will appear in a window; select the yes option. The link between the start task and the session task will be removed.
Step 3 – Now again, go to the top menu and select the link task option from the toolbox.
Step 4 – Link the session task to the command task.
Step 5 – To make the visual appearance of the workflow clear
- Right-click on the workspace of the workflow
- Select Arrange menu
- Select the Horizontal option
If you start the workflow, the command task will execute first, and after its execution, the session task will start.
- Email task – With the help of an email task, you can send emails to defined recipients when the Integration Service runs a workflow. For example, if you want to monitor how long a session takes to complete, you can configure the session to send an email containing the details of session start and end time. Or, if you want the Integration Service to notify you when a workflow completes/fails, you can configure the email task for the same.
Informatica Workflow Variables
Workflow variables allow different tasks in a workflow to exchange information with each other and allow tasks to access certain properties of other tasks in a workflow. For example, to get the current date, you can use the inbuilt variable “sysdate.”
The most common scenario is when you have multiple tasks in a workflow, and for one task, you access the variable of another task. For example, if you have two tasks in a workflow, the requirement is to execute the second task only when the first task is executed successfully. You can implement such a scenario using a predefined variable in the workflow.
Informatica Workflow Parameters
Workflow parameters are those values which remain constant throughout the run. Once their value is assigned, it remains the same. Parameters can be used in workflow properties, and their values can be defined in parameter files.
For example, instead of using a hard-coded connection value, you can use a parameter/variable in the connection name, and the value can be defined in the parameter file. Parameter files are the files in which we define the values of mapping/workflow variables or parameters. These files have the extension of “.par”. As a general standard, a parameter file is created for a workflow.
- Advantages of parameter
- It helps in the migration of code from one environment to another.
- It allows easy debugging and testing.
- Its values can be modified with ease without change in code.
- Structure of parameter file
- [folder_name.WF: Workflow_name]
- $Parameter_name=Parameter_value
Folder_name is the name of the repository folder; workflow name is the workflow name for which you are creating the parameter file.
Workflow Monitor
You can monitor workflows and tasks in the Workflow Monitor. You can view details about a workflow or task in the Gantt Chart view or Task view. You can run, stop, abort, and resume workflows from the Workflow Monitor. You can view sessions and workflow log events in the Workflow Monitor Log Viewer.
The Workflow Monitor displays workflows that have run at least once. The Workflow Monitor continuously receives information from the Integration Service and Repository Service. It also fetches information from the repository to display historical information.
How to open a Workflow Monitor?
Step 1 – Click on the workflow monitor icon in the Informatica Designer or Workflow Manager toolbox.
Step 2 – This will open the workflow monitor window
The workflow monitor tool will show the repositories and associated integration services on the left side. Under the status column, you will see whether you are connected or disconnected from the integration service. You will not see any running workflows if you are in the disconnected mode. There is a time bar which helps us to determine how long it took a task to execute.
Step 3 – The workflow monitor is in a disconnected mode by default. To connect to integration service.
- Right-click on the integration service
- Select connect option
- After connecting, the monitor will show the status as connected.
Views in Workflow Monitor
There are two types of views available in the Informatica workflow monitor
- Task view – Task view displays the workflow runs in report format, and workflow runs organize it. It provides a convenient approach to compare workflow runs and filter details of workflow runs. The task view shows the following details.
- Workflow run list – It shows the list of workflow runs. It contains folder, workflow, worklet, and task names. It displays workflow runs chronologically, with the most recent run at the top. It displays folders and Integration Services alphabetically.
- Status message – It is the message from the Integration Service regarding the status of the task or workflow.
- Node – The node of the Integration Service executed the task.
- Start time – It is the time at which a task or workflow starts.
- Completion time – It is when a task or workflow completes the execution.
- Status – It shows the status of the task or workflow, whether the workflow started, succeeded, failed, or aborted.
- Gantt View – In the Gantt chart view, you can view the workflow that runs chronologically. The Gantt chart displays the following information.
- Task name – It is the name of the task in the workflow
- Duration – It is the time taken to execute the task
- Status – The most recent status of the task or workflow
Windows in Workflow Monitor
The Workflow Monitor consists of the following windows –
- Navigator window – It displays monitored repositories, servers, and repositories objects.
- Output window – It displays messages from the Integration Service and Repository Service.
- Time window – It displays the progress of workflow runs.
- Workflow Run – It helps you to monitor the Workflow execution
- Output window – It helps you see the steps we performed in the Workflow Monitor.
- Properties Window – It displays information about the current operations in Informatica
Conclusion
So, this was all about the Informatica workflow properties like managing and monitoring and their other uses. These workflows help pass the running task information to the Integration service. It performs the ETL tasks such as reading the data from the repository, fetching data from sources, and transforming it. Finally, it loads the result data into the target. From task development to execution, there are various steps involved in it. Moreover, the workflow monitor, workflow designer, and Informatica workflow manager play a key role in this execution. Hence, you can learn more about this segment practically with real time industry experience.
Frequently Asked Questions
1.What is Informatica?
Informatica is an ETL tool that offers data integration solutions. ETL tools are the tools used to extract, transform, and load the data.
2.What does ETL stands for?
- Extract: It is a process of extracting the data from one database. In this phase, an ETL tool extracts the data from multiple sources.
- Transform: It is the process of converting the one form into another form in such a way the data can be placed in another database as well. It includes data formatting.
- Load: In the load phase, data is moved to the target database. Once the data is loaded, the ETL process is completed.
3.What is Informatica PowerCenter?
Informatica PowerCenter is an ETL tool used to build the enterprise data warehouses. It is a highly available, fully-scalable, and high performing tool. It provides reliable solutions to the IT management team. It delivers data to meet the operational and analytical requirements of the business and also supports various data integration projects
4.What do you understand about a data warehouse?
The data warehouse is a technique of integrating data from multiple sources. It involves analytical reporting, data integration, data cleaning, and data consolidations. It is used to transform the information into useful data whenever the user requires it. The data which is processed and transformed in the data warehouse can be accessed with the help of Business Intelligence tools, SQL Clients, and spreadsheets.
5.What are the uses of Informatica?
Informatica is used for the following:
- Data Migration: It means transferring the data from the traditional system to a new database system.
- Data Warehousing: Informatica is an ETL tool used for moving the data from the database or production system to the data warehouse. This process is termed as Data Warehousing.
- Data Integration: It means integrating the data from multiple sources or file-based systems. For example, cleaning up the data.
Author Bio:
I am Korra Shailaja, Working as a Digital Marketing professional & Content writer in MindMajix Online Training. I Have good experience in handling technical content writing and aspire to learn new things to grow professionally. I am an expert in delivering content on the market demanding technologies like Mulesoft Training, Dell Boomi Tutorial, Elasticsearch Course, Fortinet Course, PostgreSQL Training, Splunk, Success Factor, Denodo, etc.